Scheduling - How to use the Scheduling Tools as a Provider
GoldenSHERPA provides you with easy to use scheduling tools, without the need for a middle man. Through our platform, explorers can schedule phone calls, in-person tours, and live virtual tours directly with you. You can view and maintain these events on your scheduling dashboard. When there are new events, both the explorer and you will receive an email notification. If the event is a virtual tour, you can join the video call from the link provided in the email.
Maintaining Events:
To view and maintain your upcoming events, navigate to the "Schedule" page from the header after logging in as a provider. This view shows what type of events are upcoming and can be filtered per facility and staff. You can also decline appointments and mark yourself is unavailable.
Overview
Event types are color coded and can quickly be viewed in the month view. Click on a day to view the events for the day.
Mark Unavailable
To enter time off, such as holidays, closures and vacations, use the "Mark Unavailable" button.
From the popup, enter the title of the event, the date, whether it is recurring, the community, personnel, and click create. 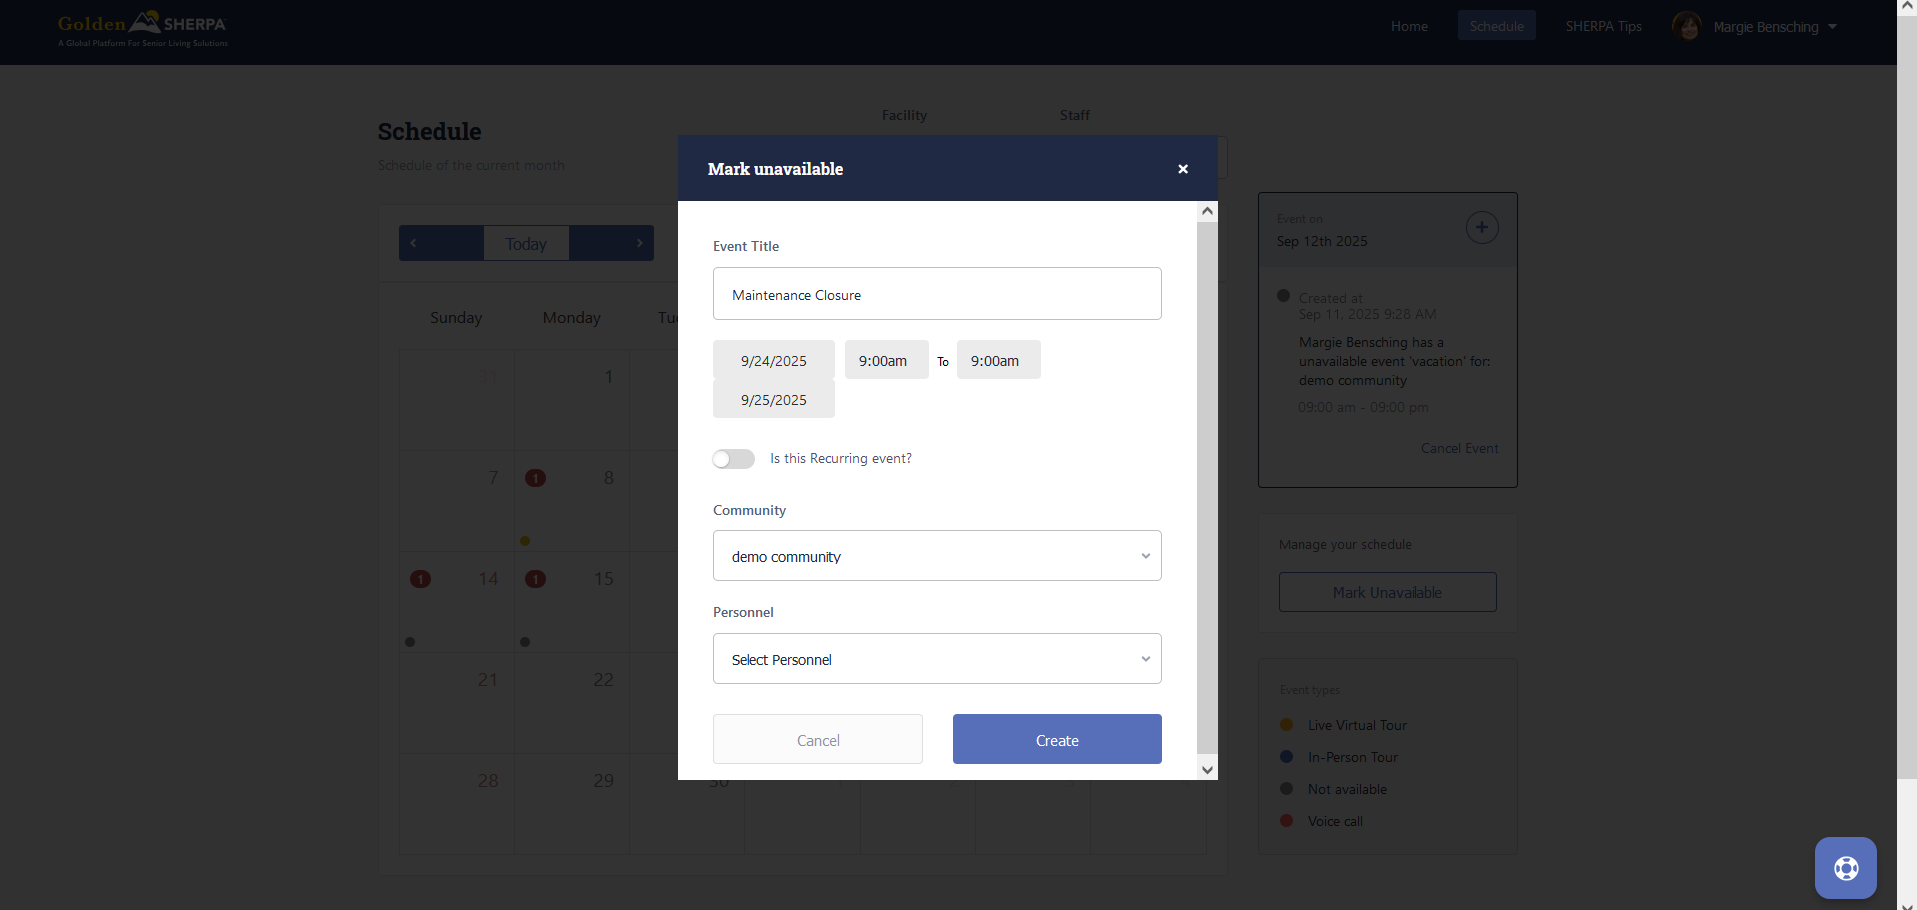
Create Event
To create a virtual tour or phone call event yourself, you can click on a date and click the "+" button.
Enter the event information including the date, time slot, event type, customer name, email, age range, gender and click create. Now this event will be on your schedule and the customer will be notified via email.
Cancel Event
To cancel an event for any reason, select the date and event, then click "Cancel Event".
You will be prompted to confirm this cancellation. If this event was with a customer, the customer will receive an email notification of the cancellation.
Editing Your Schedule Hours:
The easiest way to maintain your availability is through the "Edit Community" page. After logging in, click on your community.
From your community view page, click "Edit Community".
Scroll down to the "Working Hours" section. From here you can select your community operating hours and the average length of time it takes to give a tour to prevent overlapping appointments. 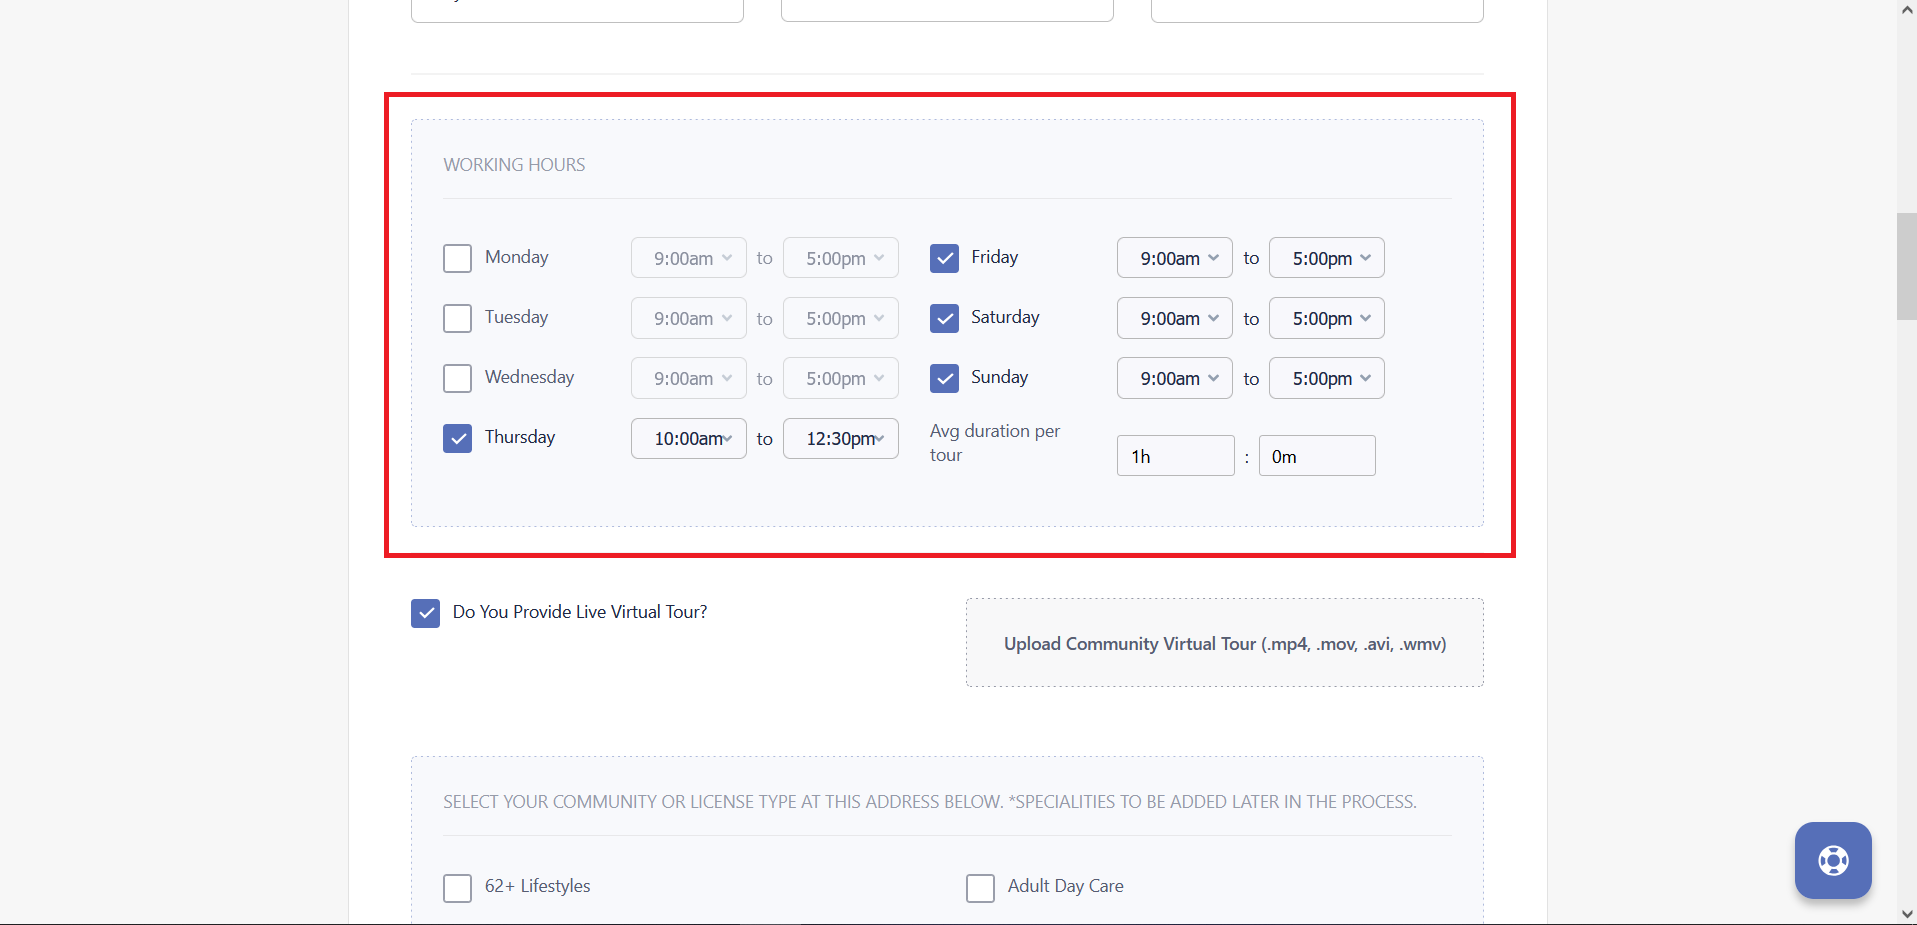
Finally, scroll to the bottom of the page and click "Continue" to save your changes. Now you are ready to schedule and receive appointments. 
If you need any additional help managing your inventory, give GoldenSHEPRA a call at 509-290-3023 or email support@goldensherpa.com.
Related Articles
Provider Information
Provider Information (accessed through community setup) provides an area to give an overview of the care type before providing specific details later on. Accessed through the left hand menu of the Community Care Types setupSchedule live virtual tours with a potential resident in minutes.
GoldeSHERPA helps senior living communities to grow their traffic and save time by scheduling virtual tours with prospects.About Care type
About Care type should provide a brief overview of the services offered within this care type. It might include information such as: - care type (memory care, 55+ community etc.) - service specialisations (dementia care, chef etc.) - amenities ...Activating your facility
After completing signup as a Provider and acceptance of the GoldenSHERPA Terms and Conditions, GoldenSHERPA will complete a verification process to include license and facility information to ensure that they are active and align with GoldenSHERPA ...Community Description
Community description should provide a brief overview of your community offerings. It might include information such as: - service specialisations (dementia care, chef etc.) - care type (memory care, 55+ community etc.) - location (e.g. "green ...